Integration from Episerver to Ka-ching
![]()
Ka-ching is a digital sales tool for retailers that bridges retail and online through assisted selling.
This Episerver Add-On aims at making it easy to use the awesome capabilities and information in Episerver Commerce as a sales tool in retail stores by integrating with Ka-ching.
When the Add-On is installed it listens for commerce data change events and if configured with import URLs it will send the updated data to Ka-ching. Version 3 of the Add-On also makes it easy to send checkout data to Episerver from Ka-ching as well as enabling customer search from Ka-ching POS with minimal effort. See below for details of what data and what events are handled.
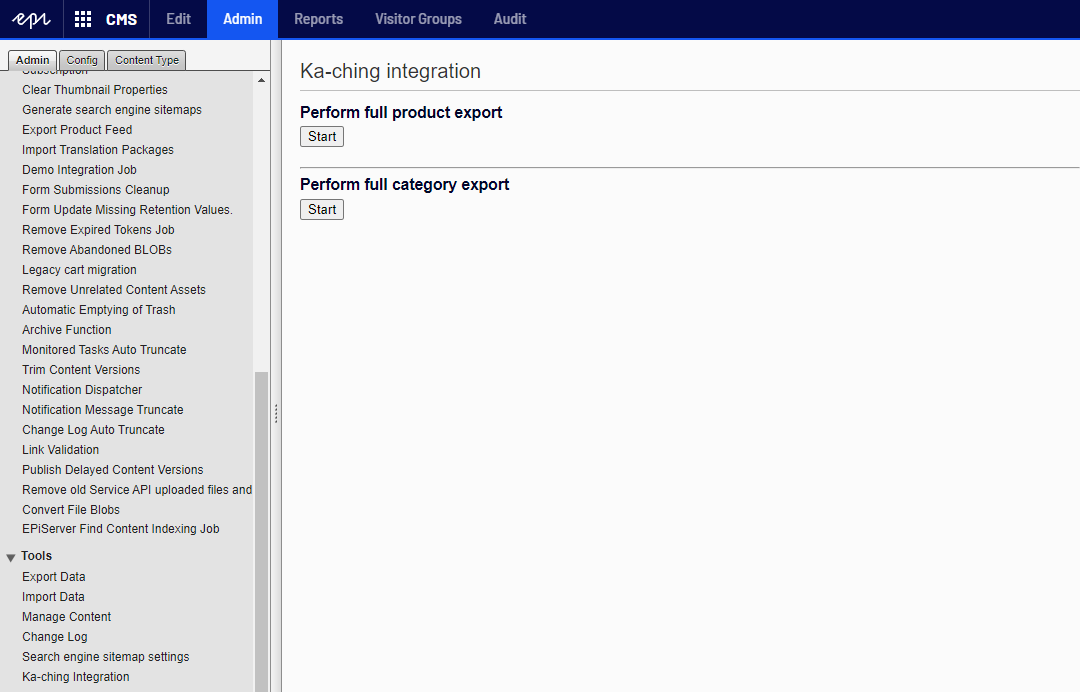
Configuration of the Add-On is done post-install in a Ka-ching section in Web.config. See below for more details. After configuration in Web.config then to perform initial exports to Ka-ching, go the CMS admin page and find “Ka-ching Integration” in the Tools section.
The current implementation is developed and tested using the Episerver reference commerce site Foundation.
All development on this Add-On is open source under the MIT license. Contributions are very welcome.
You need a Ka-ching account to use this Add-On. If you don’t have one then contact us to learn more.
If you have a Ka-ching account you can download the Ka-ching POS app and get started utilizing Episerver in your stores right away.
This section assumes you have a Ka-ching account. Get in touch using the contact details found here if you need an account.
The Ka-ching Add-On for Episerver consists of 2 NuGet packages:
You can find them on the Episerver NuGet feed. Currently the Ka-ching Add-On works with Episerver.CMS version 11 and Episerver.Commcerce version 13.
TODO
After installing the NuGet packages in the relevant Episerver projects you should see a kaching section of the Web.config in the front end project:
<kaching productsImportUrl=""productAssetsImportUrl=""productRecommendationsImportUrl=""foldersImportUrl=""tagsImportUrl=""exportSingleVariantAsProduct="false"listenToRemoteEvents="true"><systemMappings barcodeMetaField=""descriptionMetaField=""></systemMappings><attributeMappings><!--<add metaField="Brand" attributeId="brand"></add>--></attributeMappings></kaching>
In this section you need to specify URL endpoints for each data entity you wish to synchronize to Ka-ching. See more on how to obtain those below. Convert any ampersand characters & into & to avoid errors.
Ka-ching supports products without variants and if you have products with just 1 variant you can force those to be just products in Ka-ching by setting exportSingleVariantAsProduct to true. This makes it possible to tap the product in Ka-ching to put it in the basket as opposed to opening the product details page where you have to choose the variant.
To receive events from commerce data changes happing in other instances set listenToRemoteEvents to true - if you’re running more than 1 front end in load balanced setup, take care that only one of these instances have this enabled since the Commerce Manager will send push notifications to all front ends.
For all products and variants you can use the barcodeMetaField and descriptionMetaField attributes of the systemMappings mappings element to tell the Ka-ching Add-On where to look for those pieces of information and place them correctly in data sent to Ka-ching. If for example you store the barcode string that should be used when scanning barcodes in the stores in a field called EAN on the products and variants, then you specify barcodeMetaField="EAN". Those two fields should be normal strings, but we do however try to convert XhtmlString to a string by stripping tags.
If you have custom attributes on your products and variants you can map those to their Ka-ching counterparts using the attributeMappings element. The metaField is the name of the property on your product or variant and attributeId is the id of the matching attribute define in Ka-ching. You’ll have to define those manually in Ka-ching Backoffice.
The Add-On sets up two endpoints for communicting with Ka-ching:
To enable these endpoints you have to enable KachingApiKeyAuthentication which is done by activating in on the app builder in Startup.cs in the front end. You can use any string as API key. It is passed in the Authorization header in the HTTP calls from Ka-ching. See below for more on how to configure the Authorization header on the Ka-ching side.
app.UseKachingApiKeyAuthentication(new KachingApiAuthenticationOptions{ApiKey = "24E40822-228C-4D56-9BCD-9D99D2C10716"});
Go to Ka-ching Backoffice to configure the integrations needed for this Add-On to work.
After logging in, click the user icon in the top bar and click the “Advanced” option to show the “Advanced” menu in the left of the screen.
Click the “Import integrations” option. The Add-On supports synchronization to Ka-ching using the following integration points:
Copy and paste each of the URLs for those endpoints to their appropriate fields in the Web.config configuration in Episerver. Once those URLs are saved it will be possible to do an initial full export of product information and categories from Episerver to Ka-ching from the Ka-ching Integration page in CMS admin.
If you want to search for customers in Episerver from Ka-ching go to the “Runtime integrations” menu option. Click “Add integration” and choose “Add customer lookup integration”. Give it a name, an id and enter the URL of the endpoint in Episerver. HTTP method should be GET. The URL will have the form https://<episerver-host>/api/kaching/customerlookup. Click “Add HTTP header” and specify Authorization as header name with KachingKey <episerver-api-key> where <episerver-api-key> is the API key mention above. Click “Add query parameter” and specify q as the name with {search_term} as the value.
To enable real time checkout data from Ka-ching go to the “Export integrations” menu option. The setup is similar very to the setup for the customer lookup integration. Click “Add web hook” and choose “Add sale integration”. Give it a name, an id and enter the URL of the endpoint in Episerver. The URL wil have the form https://<episerver-host>/api/kaching/sales. Click “Add HTTP header” and specify Authorization as header name with KachingKey <episerver-api-key> where <episerver-api-key> is the API key mention above.
Next step is to configure matching master data in Ka-ching.
This section assumes you have a Ka-ching account. Get in touch using the contact details found here if you need an account.
Go to Ka-ching Backoffice to manage the manual data maintenance listed below.
More info on how to use the Ka-ching Backoffice can be found on our Zendesk site.
attributeId specified in the Web.config configuration in Episerver.This solution assumes the following:
Code - Ka-ching can handle a product being placed multiple places in a folder structure, but the Add-On currently doesn’t have the logic to handle it.We might be able to remove some or all of those in future versions.
Ka-ching prices are including VAT style taxes and excluding “sales tax” style taxes. This solution assumes that the value in IPriceAmount.UnitPrice.Amount uses the same semantics.
Ka-ching has a limitation on certain characters in ids so the Add-On sanitizes the codes on Episerver models the way out of Episerver and desanitizes on the way back in. For example a product code of “.123123” would be turned into a product id of “%2E123123” in Ka-ching. When data from a checkout in Ka-ching is processed in Episerver the product id from Ka-ching “%2E123123” is turned back into “.123123”. Restricted characters are the following: “.”, “$”, “#”, “[“, “]”, “/“, “*” plus ASCII control characters (0x00-0x1F and 0x7F).
Ka-ching has a concept of connecting variants through dimensions and dimension values. It can be used as a structured way of selecting variants in the POS app. A dimension could for example be Size and that dimension could have values Small, Medium and Large. This version doesn’t have any way of configuring product dimensions and which custom attribute in Episerver to use as valsues.
Instead you will see a list off all variants in the product details page in POS. To be able to distinguish between there are a couple of ways to go:
Ka-ching is capable of handling custom taxes on a per product basis that override the default taxes specified for a particular market, but the Add-On doesn’t look for custom taxes in Episerver.
Ka-ching doesn’t support product bundles or packages out of the box, so these have been skipped in this version. It might be added in a future version.
Customers are found by CustomerContext.Current.GetContactsByPattern(q) and the results are then converted into Ka-ching format. The following fields are used:
By default if a sale export web hook is configured in Ka-ching, data from all checkouts are passed on the receiver.
The Add-On currently filters out data that represents returns and voided sales. Voided sales are sales that have at least one successful payment, but are then aborted.
For normal sales the Add-On creates orders in Episerver where the order shipment status is set to Shipped.
If the feature is enabled in Ka-ching, it’s possible for the store associates to sell items from the webshop with the expectation that the webshop will handle fulfillment of the order. It’s useful if the store doesn’t carry the full product catalogue or they are temporarily sold out of a particular item that the customer wants.
This kind of sale in Ka-ching will have a special line item that represents the shipping information, like delivery address, id of shipping method and costs. If such a line is present the Add-On will create a separate shipment with status AwaitingInventory and the order itself will be marked as InProgress.
Shipping methods are currently manually defined in Ka-ching with flat fees. At this point we only try to parse the method id as a GUID and if it succeeds it’s assigned to ShippingMethodId of the shipment.
In the Foundation solution go to the EPiServerLog.config file in src\Foundation and add these lines inside the <log4net> tag.
<logger name="KachingPlugIn"><level value="Info" ></level><appender-ref ref="debugLogAppender" ></appender-ref></logger>
If there’s no debugLogAppender appender defined then paste this element inside the <log4net> tag.
<appender name="debugLogAppender" type="log4net.Appender.RollingFileAppender" ><file value="..\appdata\SiteDebug.log" ></file><encoding value="utf-8" ></encoding><staticLogFileName value="true"></staticLogFileName><datePattern value=".yyyyMMdd.'log'" ></datePattern><rollingStyle value="Date" ></rollingStyle><lockingModel type="log4net.Appender.FileAppender+MinimalLock" ></lockingModel><appendToFile value="true" ></appendToFile><layout type="log4net.Layout.PatternLayout"><conversionPattern value="%date [%thread] %level %logger: %message%n" ></conversionPattern></layout></appender>
DestinationFolder in this tag <Copy SourceFiles="@(_CopyItems)" DestinationFolder="C:\Users\User\nugets" ></Copy>to match the path of your local nuget folder.develop branch (as of 20th of July 2020) . We never managed to start up Foundation from the master branch.(LocalDB)\. when specifying the local database server.install-package KachingPlugIn.Web.